How to Fix Banding in Photoshop
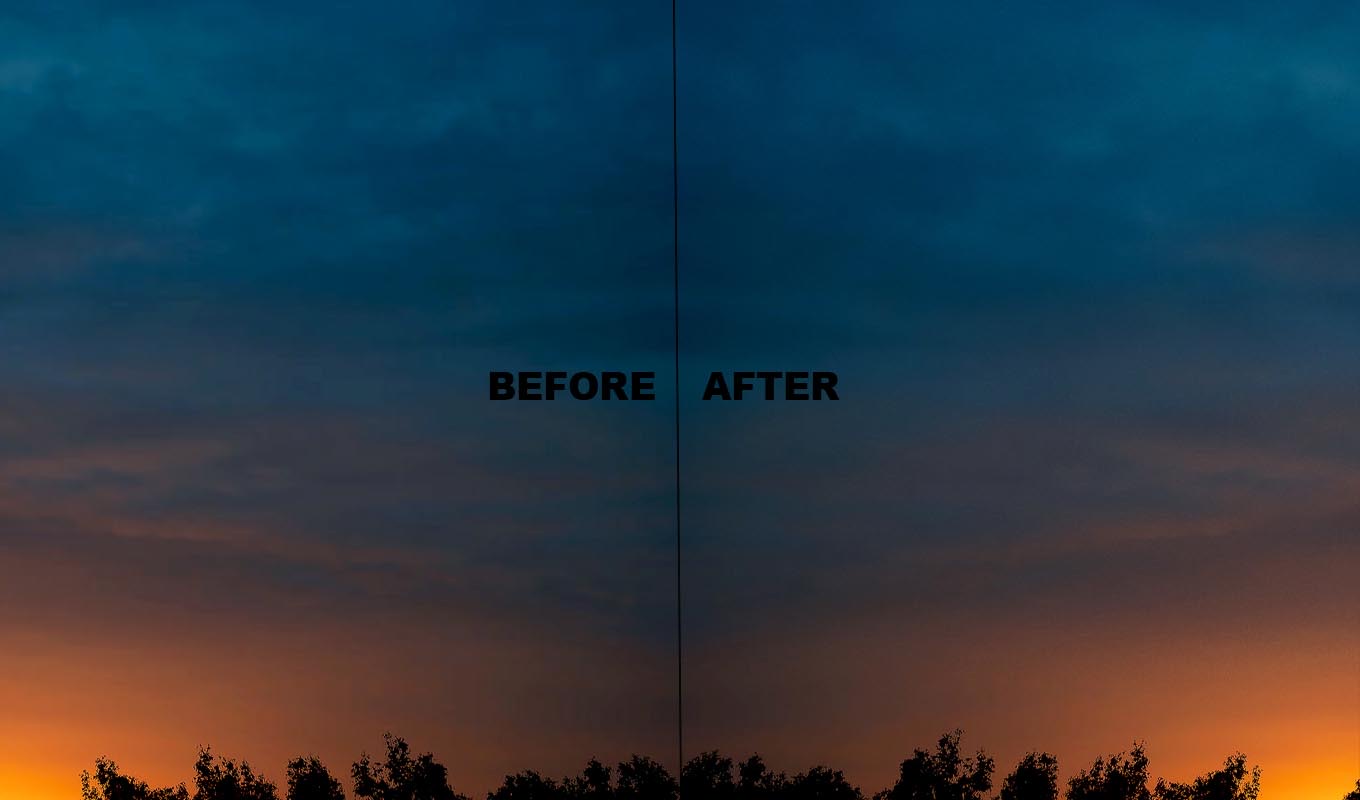
Banding is the stripes you see in a smooth area of a photo: a sunset that looks like a stack of colored bands, a blue sky with steps in it, a gray studio background with rings around the light. The tone should change smoothly, but there are not enough tones in the file to draw it, so Photoshop shows a step every few pixels.
The good news: it is one of the easiest problems to fix once you know the two moves that matter. Smooth the steps, then break them up with noise.
First, Check It Is Really Banding
- Zoom to 100%. Photoshop previews at other zoom levels can show steps that are not in the file.
- Look on another screen. Many monitors and laptops show banding on smooth gradients by themselves. If the stripes disappear on your phone, the file may be fine.
- Open the Info panel and move the cursor across a stripe. If the numbers jump in clear steps, the banding is in the file.
Why Banding Happens
- 8-bit files. An 8-bit channel has 256 levels. A sky that only uses a narrow part of that range has very few tones to work with.
- Strong edits. Curves, Dehaze, heavy contrast or saturation on a smooth sky stretch those few tones apart, and the gaps show as stripes.
- JPEG compression. Every JPEG is 8-bit, and low quality settings smooth away the small variations that hid the steps.
- Digital gradients. A gradient drawn without dither across a big area is a perfect staircase.
Method 1: Work in 16-bit
If the photo starts as a RAW file, open it from Camera Raw as 16-bit (click the workflow line under the preview and set Bit Depth to 16 bits). For a file already open, go to Image > Mode > 16 Bits/Channel before you edit the sky.
Be honest with yourself about what this does. Converting an 8-bit JPEG to 16-bit does not bring back tones that were never there. What it does is give the blur and the noise below room to create smooth in-between tones instead of new steps.
Method 2: Blur the Stripes on a Mask
- Select the area. Use Select > Sky for skies, or the Object Selection tool for a background. Feather the edge a little.
- Duplicate it. Press Cmd/Ctrl+J with the selection active, or duplicate the layer and add a mask from the selection.
- Blur. Go to Filter > Blur > Gaussian Blur. Raise the radius until the stripes melt into a smooth change. The radius needs to be wider than one stripe, so wide bands need a big radius. Gaussian works better here than Median, because Median keeps the steps.
- Protect the edges. Keep the blur away from trees, buildings, the horizon and people, or they get a soft halo. Paint black on the mask near them.
Deband Pro: fix banding in Photoshop with a brush
One click switches the photo to 16-bit and builds the fix, then you paint over the stripes. The gradient smooths out and fine grain keeps the banding from coming back when you save.
GET DEBAND PRO →“I almost gave up on one of my favourite sunset photos because of horrible banding in the sky. This saved it! I'm genuinely so happy I found this tool.”
“This tool is now something I reach for immediately. I paint over the affected areas and the difference is incredible!”
“I was THIS close to deleting an image because the sky looked terrible. I decided to give this plugin a try, and wow. It saved an image I thought was beyond fixing.”
“I shoot a lot of sunsets and skies, and banding has always been one of those annoying things that can ruin an otherwise perfect image. A few brush strokes and the gradients look smooth again.”
“I almost gave up on one of my favourite sunset photos because of horrible banding in the sky. This saved it! I'm genuinely so happy I found this tool.”
“This tool is now something I reach for immediately. I paint over the affected areas and the difference is incredible!”
“I was THIS close to deleting an image because the sky looked terrible. I decided to give this plugin a try, and wow. It saved an image I thought was beyond fixing.”
“I shoot a lot of sunsets and skies, and banding has always been one of those annoying things that can ruin an otherwise perfect image. A few brush strokes and the gradients look smooth again.”
Method 3: Add Noise
This is the step most tutorials skip, and it is the one that makes the fix last. A perfectly smooth gradient will band again when you save it as an 8-bit JPEG. Fine noise mixes the tones at the edge of each step, so there is no clean line for your eye to follow.
- Create a new layer, go to Edit > Fill and fill it with 50% Gray. Set the blend mode to Overlay.
- Go to Filter > Noise > Add Noise. Use a low amount, Gaussian, and tick Monochromatic so the noise has no color speckles.
- Clip it to the sky mask, or give it the same mask. Lower the opacity until you cannot see the noise at normal viewing size but the stripes are gone at 100%.
Camera Raw Filter has a Grain slider that does the same job if you prefer sliders. Keep the grain size small.
Method 4: Dither New Gradients
If you draw gradient backgrounds yourself, tick Dither in the options bar of the Gradient tool. It adds tiny noise as Photoshop draws the gradient, which prevents banding from the start. Gradient Map adjustment layers have a Dither box too.
Export So It Stays Gone
- Keep the master as a 16-bit PSD or TIFF.
- For JPEG, use a high quality setting. Low quality brings the stripes back.
- If the photo goes to social media, which compresses again, leave the grain slightly stronger than you think you need.
Where Deband Pro Fits
I make Deband Pro, so weigh that. It does methods 1 to 3 in one click: it switches the photo to 16-bit, builds a smoothing layer and a grain layer in a group with a black mask, and you paint white over the stripes. Blur Radius goes from 5 to 150 px for narrow or wide bands, and Smoothing and Grain stay adjustable after you paint. It is not AI. It uses Photoshop filters and runs offline. Boris FX Optics also has a deband filter if you already own Optics.
Limits: it blurs what you paint, so keep the brush on the smooth parts and away from clouds you want sharp, trees and edges. It does not fix the blocky squares of a very compressed JPEG. Start from the best file you have.
Quick Guide
| SITUATION | FIX |
|---|---|
| Banding in a sunset or sky | 16-bit, Gaussian Blur on a sky mask, then noise |
| Rings on a studio background | Blur on a background mask, then noise |
| Your own gradient bands | Redraw with Dither ticked |
| Stripes only on your screen | Check at 100% and on another display |
| Banding after upload | More grain, higher JPEG quality |
More on why skies band and how to shoot so they do not: color banding in sky photos. If you edit in Lightroom, see how to fix banding in Lightroom. Smooth backdrops band too after blurring, which I cover in removing backdrop wrinkles.
Deband Pro: fix banding in Photoshop with a brush
One click switches the photo to 16-bit and builds the fix, then you paint over the stripes. The gradient smooths out and fine grain keeps the banding from coming back when you save.
GET DEBAND PRO →Frequently Asked Questions
How do I get rid of banding in Photoshop?
Switch to 16-bit with Image > Mode > 16 Bits/Channel, select the banded area, apply Gaussian Blur on a masked copy until the stripes melt, then add a little monochromatic noise on a 50% gray Overlay layer so the banding does not return on export.
Why does my gradient have banding in Photoshop?
There are not enough tones in the file to draw a smooth change, usually because the file is 8-bit, the gradient was drawn without dither, or strong edits stretched the tones apart. Tick Dither on the Gradient tool and work in 16-bit.
Does converting to 16-bit fix banding?
Not by itself. It does not restore tones that an 8-bit file never had. It gives blur and noise room to create smooth in-between tones, so use it together with them.
Why does banding come back when I save a JPEG?
JPEG is always 8-bit and compression smooths away fine variation. Adding fine noise before export and saving at high quality keeps the stripes from returning.
Is color banding my monitor or my photo?
Check at 100% zoom, read the values in the Info panel across a stripe, and view the file on another screen. If the stripes only show on one display, the file is probably fine.